
Planning a Design(wine bottle project)
In this article and video I would like to discuss some ideas about sequencing objects in a design and choosing the tools and stitch types I think are most suited to create the vector shapes.
When planning the design I take into account, the garment and fabric the design is to be stitches on to, the color sequence, the look I want to achieve and the most stitch efficient path to take when constructing the design.
For commercial embroiderers reducing thread trims is essential to improve workflow and profit.
When planning this design I decided to begin from the bottom and work up where possible, in the vent that at some time in the future it may go on a cap.
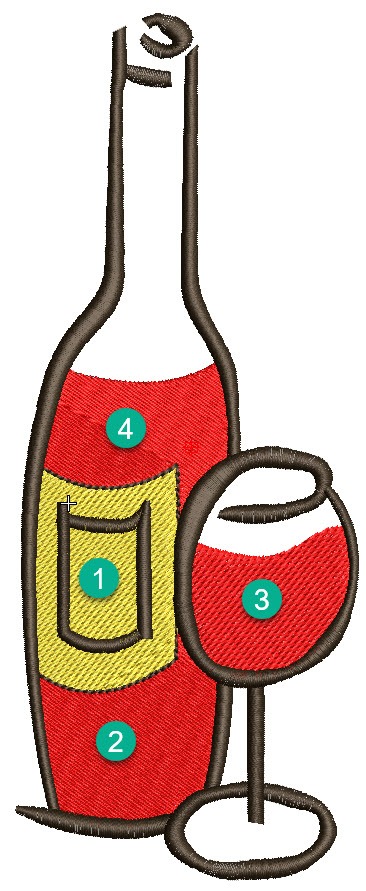
I decided to stitch the lighter colored label first so the darker colored wine would be most likely to cover where the objects overlap.
The yellow label and red wine are larger areas of fill and most suited to the Complex Fill Tool and Tatami Fill Stitch Type. The red areas are separate objects allowing for a different stitch angle on the glass to the top and bottom of the bottle. So the stitch order is the:
Label
Bottom of the bottle
The Glass
Top of the bottle.
These are all larger objects, so tatami stitch seemed most appropriate and the best tool is Complex Fill (F3)
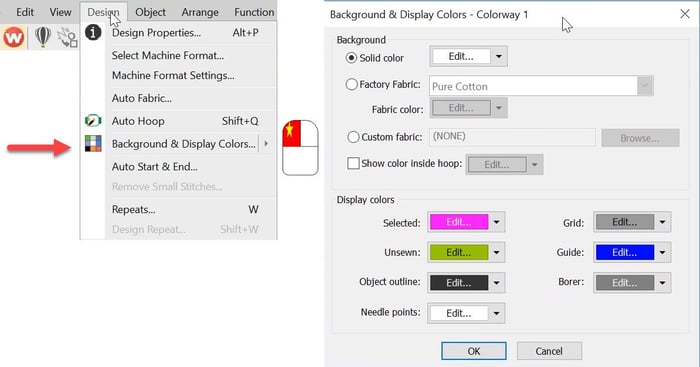
In this example you will notice (in the video) the gap between objects 3 and 4 is greater than the connector value and a thread trim is created. The solution is to adjust the thread trim setting upward, in this case from 2 mm to 4mm.
Look for the Trim Setting in the Connectors TAB in Object Properties. See below image.

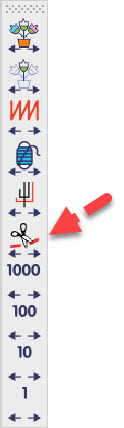
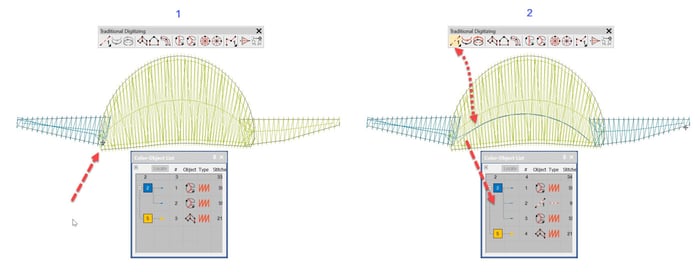
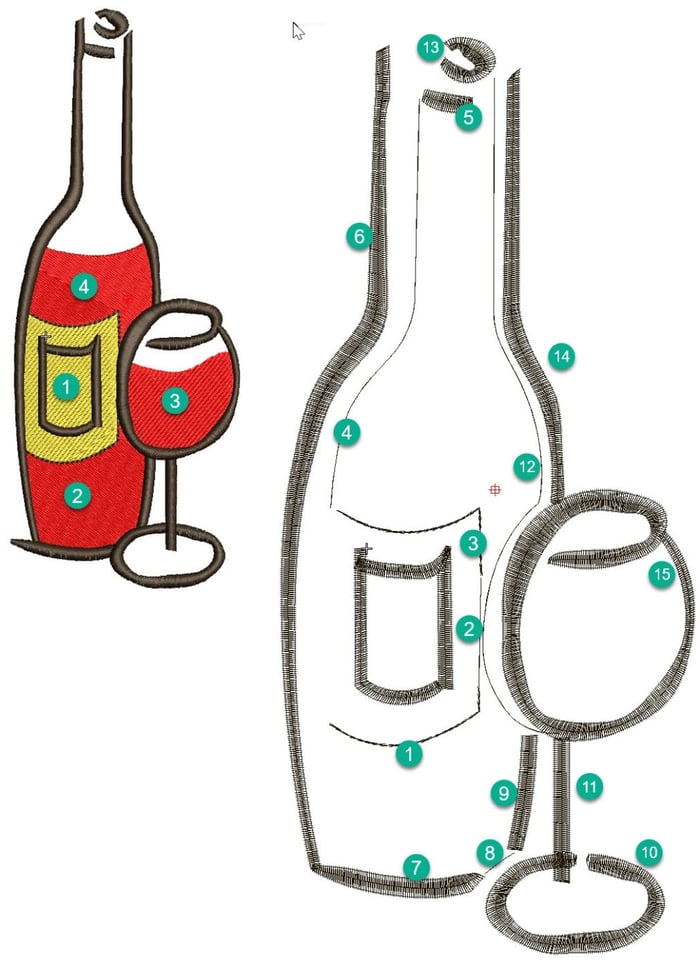
The quickest way to identify thread trims in a design is to travel through the design by left or right clicking on the scissor icon in the Travel Toolbar.
Left click to move back through the design and right click to move forward through the design.
Once you have moved to the trim point you can “nest” a run stitch to close the gap, reshape the object to make the gap smaller or as in this case extend the trim measurement in the connector properties.
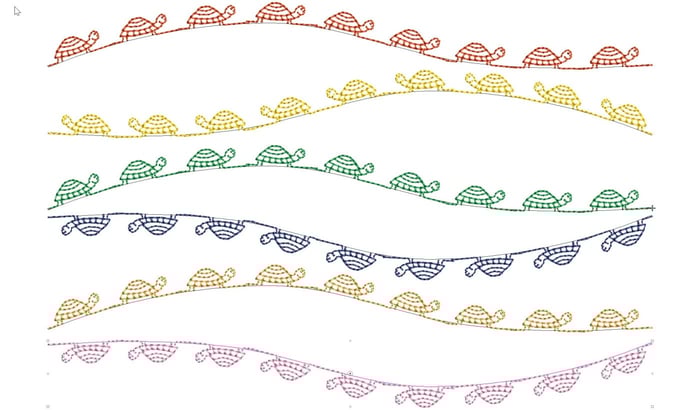
Note I have moved objects 6,10,14 and 15 aside to show connecting stitches that are covered in the final design.
The tools used are the outline tools which takes on a run property and for the detail around the label Backstitch.
The rest is Column A with a satin fill type.
the border around the label is too narrow for a satin column so I thought Backstitch would provide some column width and work well.
The border is only required on three sides, the top and bottom (1 and 3) are separated by a “joining” run stitch to avoid trimming. The sections 2 and 12 will be covered later by satin stitch 14 and 15.
Object 4 is a running stitch simply to serve as a travel run to get to object 5 without creating a trim.

Ask about the world's
favorite embroidery software!

Got questions? We’re here to help.
Contact us