

Laydown Stitch and Rounded Corners
Features That’ll Amaze You—and Tame Your Towels!
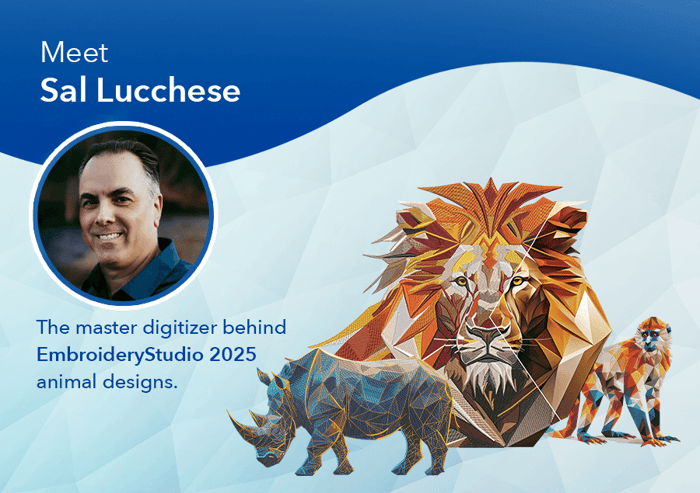
New Features in EmbroideryStudio 2025
Embroidery just got smarter and more efficient with Wilcom EmbroideryStudio 2025! In this guide, we’ll introduce two standout new features designed to elevate your digitizing experience: The Laydown Stitch and Rounded Corners Tools.
New Features
 Laydown Stitch – A must-have for high-nap fabrics, creating a smooth base that makes towel embroidery effortless.
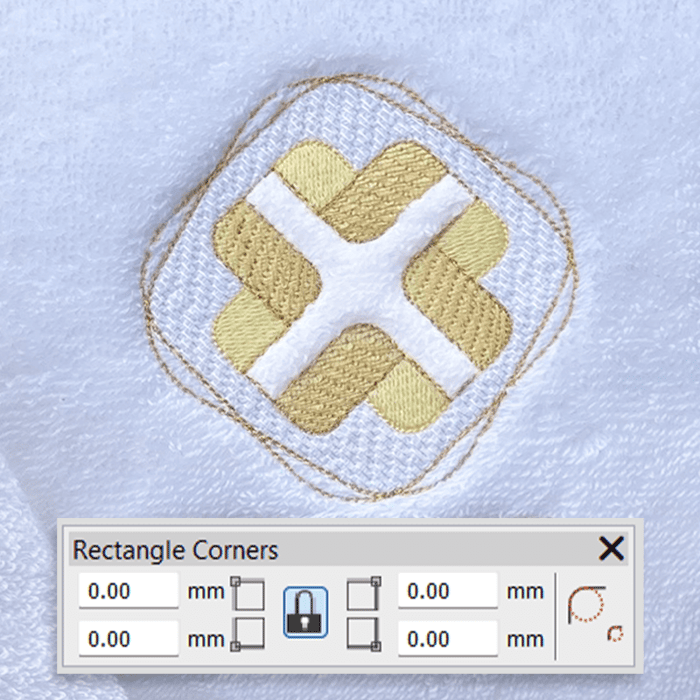 Rectangle Corners – Achieve perfectly rounded corners with adjustable radius options, giving you complete control over shape details.
But that’s not all! We’ll also touch on other powerful new features that enhance digitizing efficiency and workflow.
 Trim and Connectors Display is highlighted for easy editing.
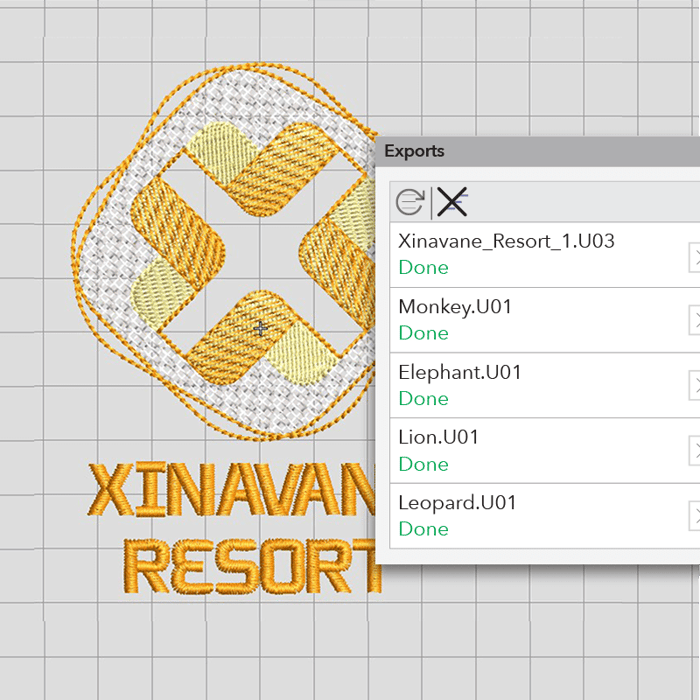 The Exports Docker shows the export status while you continue digitizing!
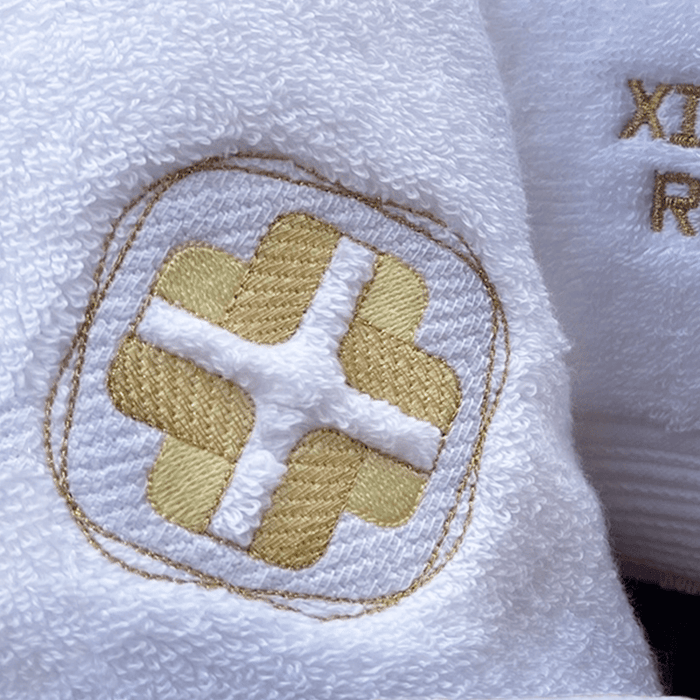
Towels have always been a challenge to embroider due to the nap of terry toweling fabric. Forget fiddling with water-soluble film—the Laydown Stitch Tool is here to save the day! This hero for high-nap fabrics, creates a smooth foundation for your designs, making towel embroidery a breeze.
For shape perfection, the Rectangle Corners Tool (we like to call it the Rounded Corners Tool) ensures smooth, precisely digitized curves with independent corner control.
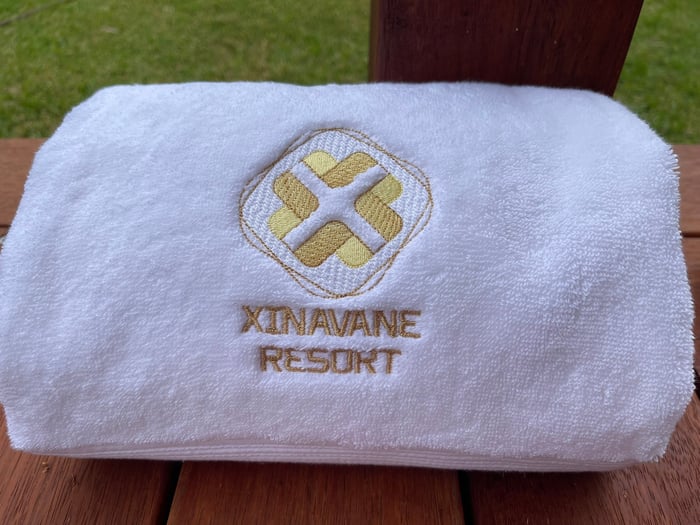
We put these tools to the test with the Xinavane Resort logo, using the towel’s natural texture creatively. The result? A production-ready logo with stunning clarity in no time!
Step-by-Step
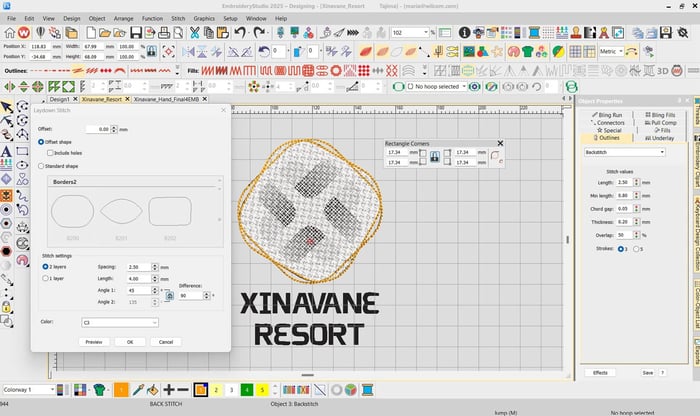
1. Draw a rectangle, rotate it 45° and select the Reshape Tool. To create a curved corner, click and drag a corner node to separate it, opening the curve. Then, adjust the nodes to change the radius. Alternatively, you can enter exact measurements in the Rectangle Corners toolbox.
Select Back Stitch for the outline. (Duplicate the rectangle for the second shape.)
Note: The curve retains shape even when the rectangle object is rotated or skewed.
2. Select one of the rounded-corner shapes and click Laydown Stitch. Set the Offset to 0mm and choose Offset Shape. Next, select 2 layers in Stitch Settings, keeping the default options. (Hint: Select the JPG image and press ‘K’, or right-click to lock it in the Color-Object List.)
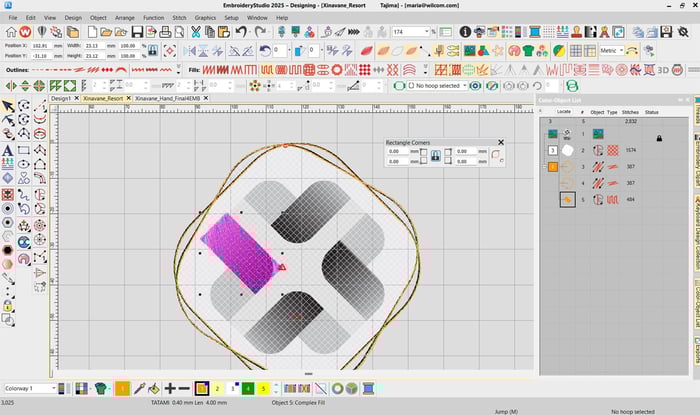
3. Let’s start with the inner shapes. First, draw a rectangle, rotate it into position, and select the Reshape tool. In the Rectangle Corners toolbox, click the unlock icon, then set one pair of opposite corners to a 7mm radius while keeping the other two at 0mm.
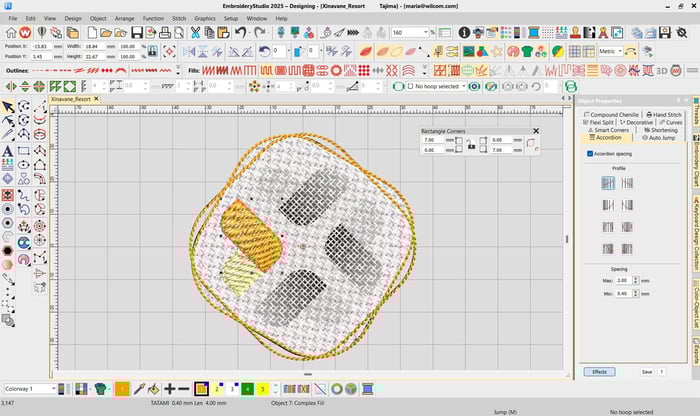
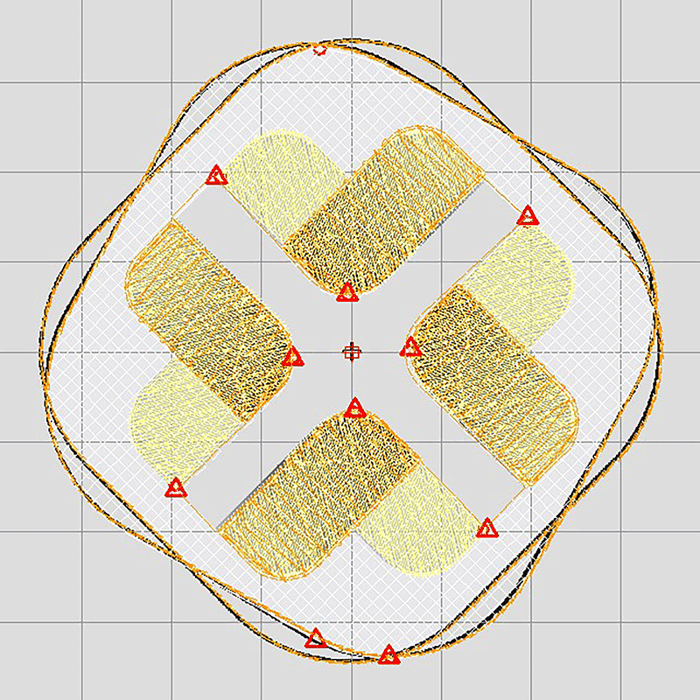
4. Draw or duplicate the rectangle. Join the bottom shapes using Arrange > Shaping > Weld and apply Tatami. Create a new rounded corner shape and apply the Accordion Spacing to add the graduated color.
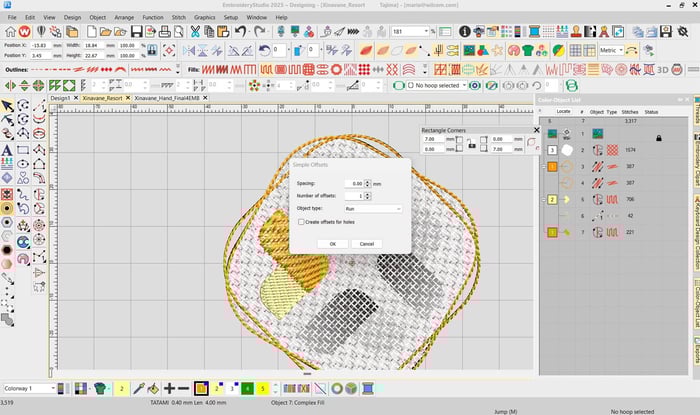
5. Select each of the rectangles just created and click the Simple Offsets Tool. Choose Run Stitch to help define the shape.

6. Select the objects and click Mirror Merge. Choose Wreath and position the shapes to match your logo design.
7. Cut the Laydown Stitch to define the ‘X’ in the centre, allowing the nap of the terry toweling to show through as a featured element.
Note: The new Trim and Connectors Display is highlighted for easy editing.)
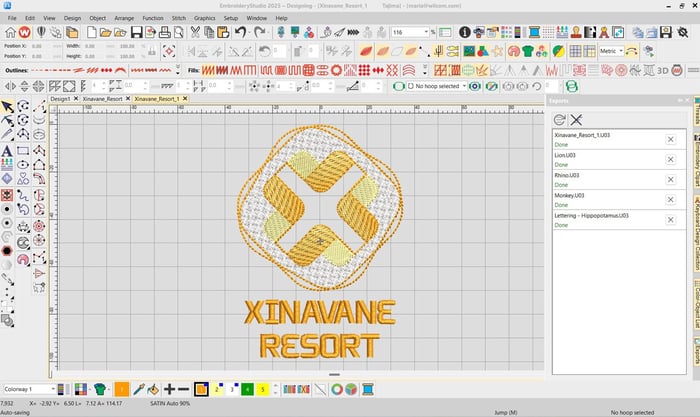
Note: The new Exports Docker allows you to multi-task. Export to a stitch file while you continue working on the next job!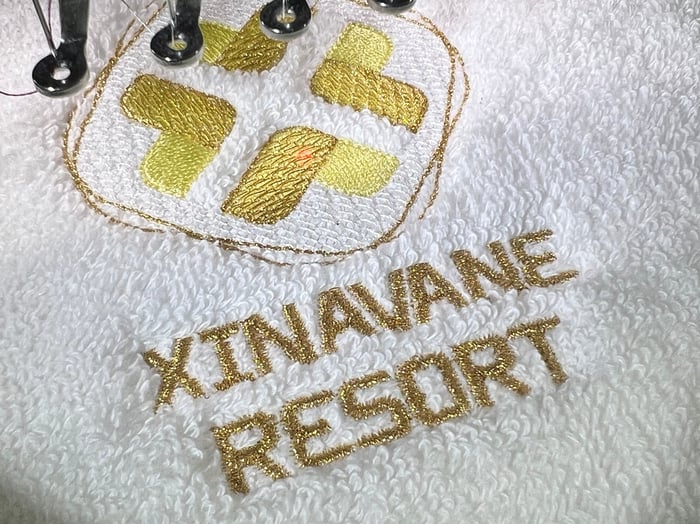
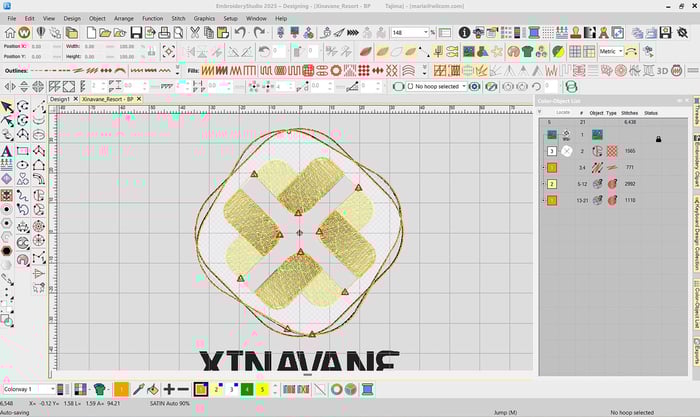
9. Finally, simply add the words using Wilcom EmbroideryStudio’s extensive font library.
Tip: Add a touch of metallic for a sophisticated look.
See it in action
Ask about the world's
favorite embroidery software!
Got questions? We’re here to help.
Contact us