
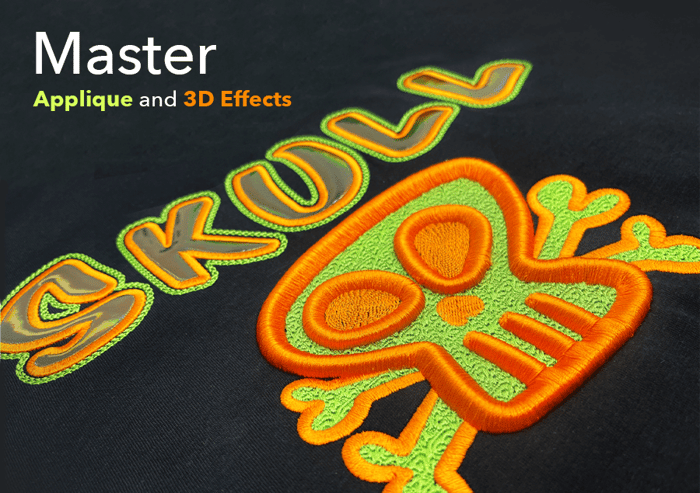
Appliqué and a Bevelled 3D Effect
Advanced Embroidery Techniques

Follow our step-by-step guide to creating a bold, textured skull design that combines appliqué and a bevelled 3D effect using Wilcom lettering.
By blending custom program splits, Wilcom lettering, Outlines & Offsets, and layered 3D techniques, we’ve produced a dramatic dimensional effect—perfect for standout seasonal designs.
Step-by Step Guide to
Appliqué and a Bevelled 3D Effect
Part 1: Lettering Setup (Appliqué Letters)
1. Create Lettering
- Font: Pastille | Height: 50mm | Spacing: 13mm

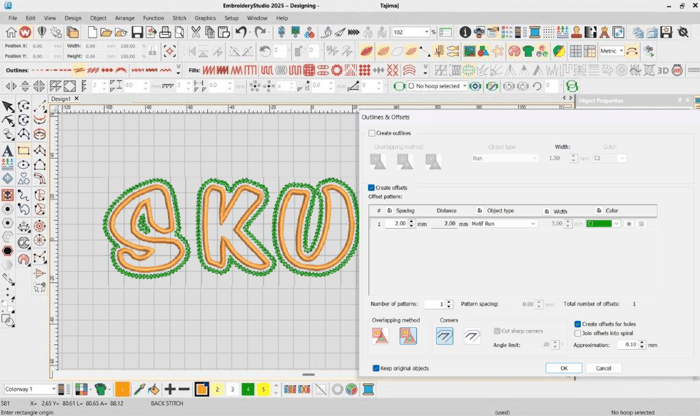
2. Apply Outlines and Offsets
- Offset: 1mm Run Stitch | Corners: Rounded
- Remove check box – 'Create offsets for holes' and 'Keep original objects'

3. Frame out Position
- Create a crosshair guide for the frame out positioning.

4. Convert to Appliqué
- Select all > Right-click > Convert to Appliqué.

5. Reshape Letters
- In Reshape mode, adjust appliqué objects so letters don’t overlap.
Note: Any adjustments to an applique object will auto-adjust the Guide, Tack, and Cover stitch at the same time, so you don’t have to adjust the individual layers.

6. Add Decorative Motif Outline
- Outlines & Offsets: 2mm Motif Run (Green)
- Use an existing Motif or create your own.
- Check – 'Keep original objects' and 'Create offsets for holes'
Part 2: Preparing Appliqué Pieces
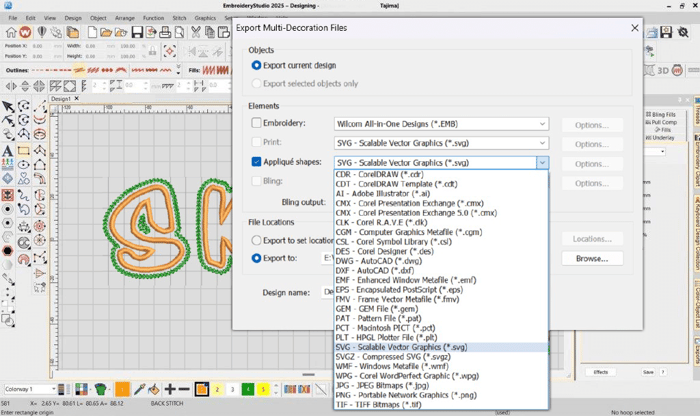
- Export Shapes for Cutter
- Go to File > Export Multi Decoration > Export Current Design > Appliqué Shapes.
- Export to the format required by your cutter.
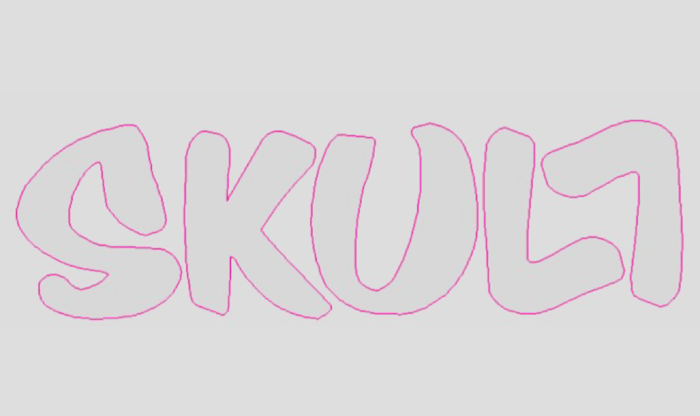
8. Optimize in CorelDRAW
- Open vector file in CorelDRAW.
- Adjust graphics, flip shapes where useful (e.g. flip the “L”) to minimise fabric waste.
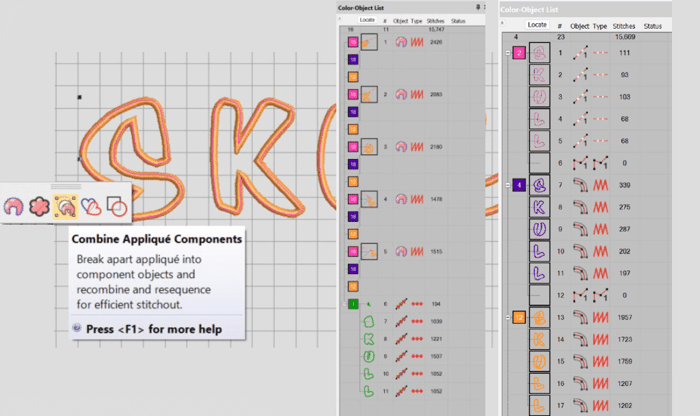
9. Combine Components
- Click back into EmbroideryStudio workspace. To optimize the stitch sequencing for applique..
- Select the appliqué objects.
- Combine Appliqué Components to streamline sequencing and reduce color changes.
Part 3: Digitize the Skull
- Digitize Skull Base
- Digitize all non 3D embroidery first
- Digitize the skull, create a Custom Program Split for the skull. (Program Split Fill (custom split created from skull image).
- For the eyes, apply Tatami fill with Spiral effect.
- Add Column A satin objects for the outline of the skull.

- Foam Preparation
- Digitize and use 2 layers of foam for the skull outline. To avoid flattening the 3D puff, raise the presser foot to 5mm (if the machine allows).
⚠️ Tip: Change to a fresh needle and reduce machine speed to reduce breaks.
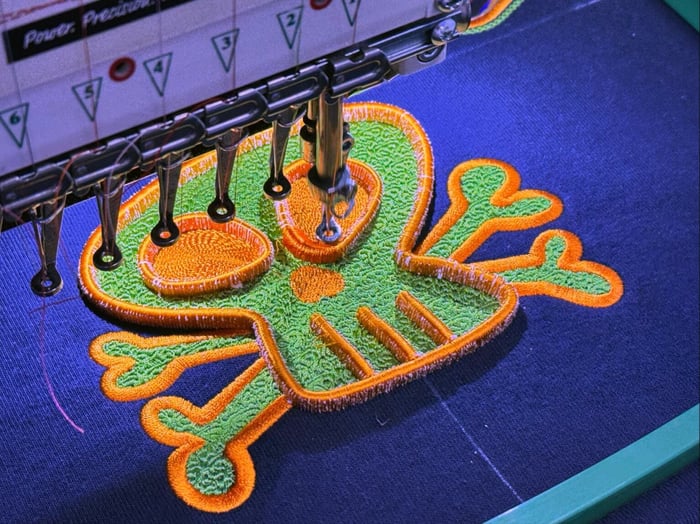 Stitch over the foam a second time with an extra wide satin cover stitch
12. Secure Foam
- Use standard satin to secure the foam, density: 0.40mm.
- Extra wide Satin cover stitch = 3x the width of the foam.
- Always cap the ends for 3D foam stability.
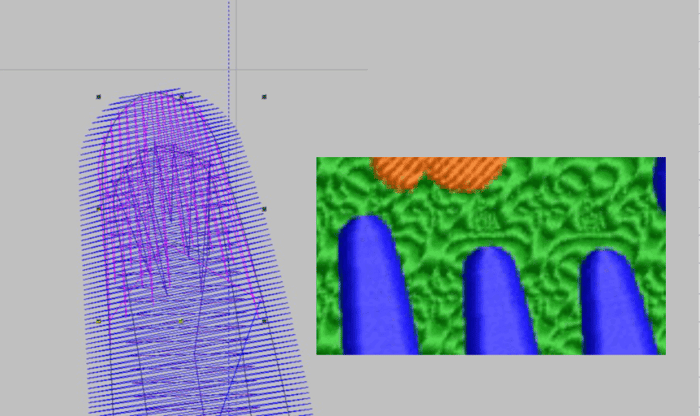
13. Remove Foam
- After stitching, peel away the excess foam for the reveal.
- Use Column A satin stitch.
- Density: 0.16mm. (tight density)
- Stitch length: 10.49mm (this is an extremely long satin stitch, but it’s required to create the bevelled 3D effect)
- Speed: Slow down machine to ~200 rpm for clean coverage over high foam.
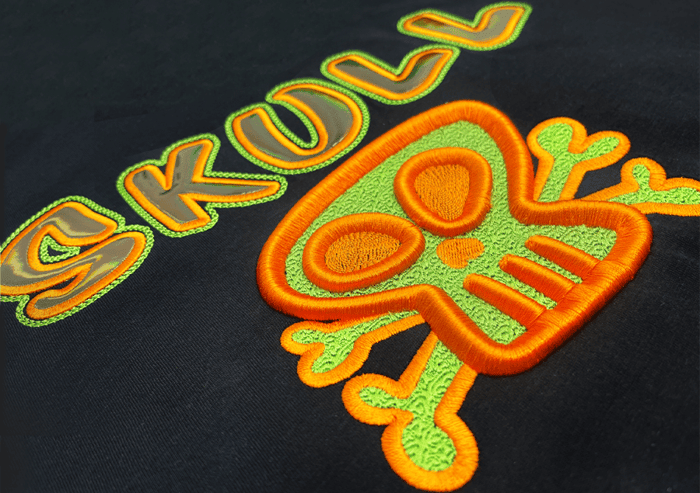
Appliqué and a Bevelled 3D Effect Result: Bold lettering with vinyl appliqué and a striking bevelled 3D skull design that adds depth and texture.
Ask about the world's
favorite embroidery software!

Got questions? We’re here to help.
Contact us