
EmbroideryStudio

How to cut your digitizing time in half!
Blog | EmbroideryStudio | Feature overview
With EmbroideryStudio e4 Elements, you no longer need to make this sacrifice! These add-on Elements automate many complex embroidery techniques, which means you can bring your visions to life and...
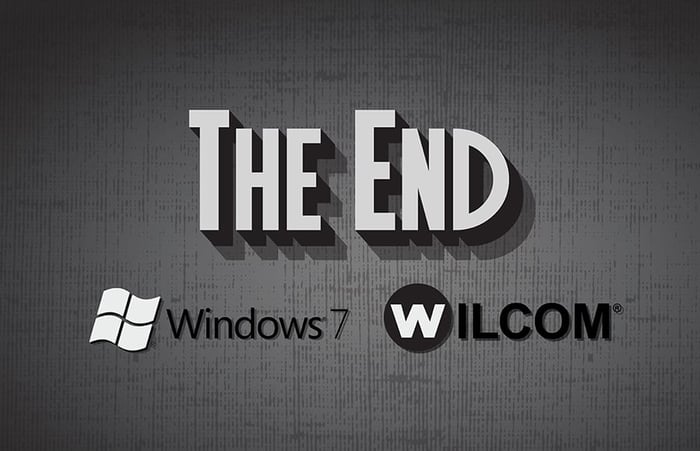
Support for Windows 7 is ending
Blog | EmbroideryStudio
As Microsoft says, all good things come to an end. Microsoft has officially announced as of “January 14, 2020, Microsoft will no longer provide security updates or support for PCs...
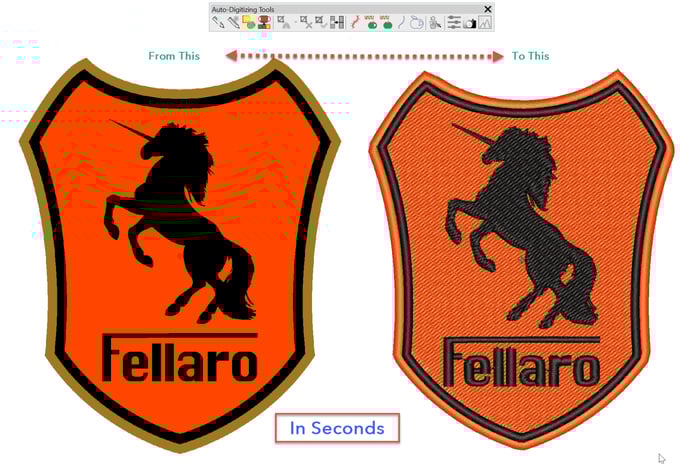
Auto Digitizing with Decorating
Blog | EmbroideryStudio
If you have clean bitmaps with minor pixellation available then the Instant Smart design tool in the Auto digitizing toolbar can create an embroidered design in seconds which is ideal for quoting and in...

2019 CorelDRAW Designing Contest
Blog | EmbroideryStudio | News and Stories
Show the world what you can create with CorelDRAW. All you have to do is submit an original CorelDRAW® 2019, Corel PHOTO-PAINT® 2019 or Corel DESIGNER® 2019 creation to be entered to win....
The Dockers
Blog | EmbroideryStudio | Feature overview | Tips & Tutorials
The Dockers could be thought of as part of the control system of the software.The place where you can set up your thread chart and working palette or view and control an objects properties, select...
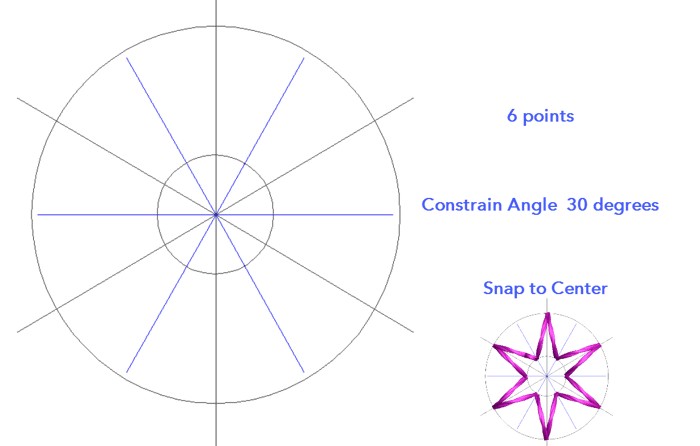
Create a Star template in CorelDRAW
Blog | EmbroideryStudio
This template could be made with the Embroidery Studio Drawing Tools in the Graphics Toolbar but there are a couple of features in CorelDRAW which makes the procedure quicker and more accurate.Both are...
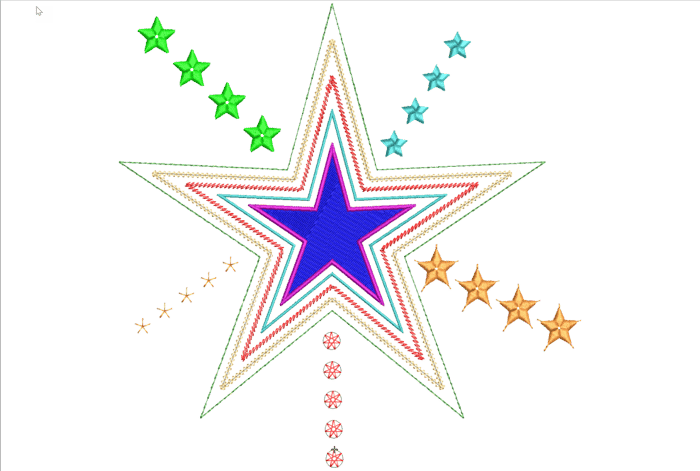
Create Embroidered Stars
Blog | EmbroideryStudio | Tips & Tutorials
Stars and other symmetrical designs occur in lots of embroidered files at many different sizes and a variety of styles, in the following article and video I will explore a few ideas for you to develop and...
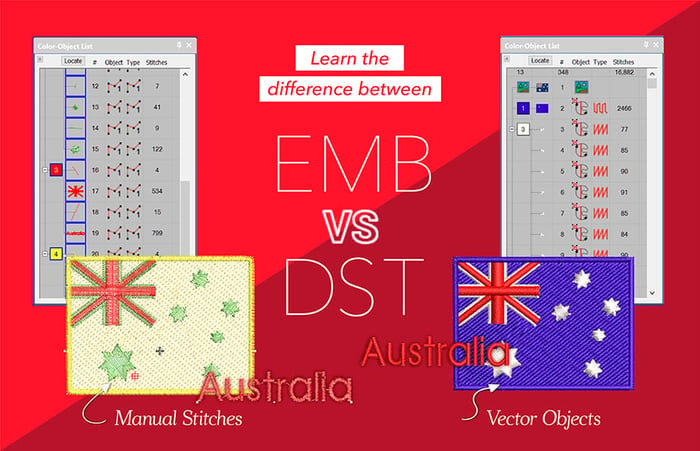
Compare .emb and .dst
Blog | EmbroideryStudio | Tips & Tutorials
The embroidery objects created in EmbroideryStudio are vector-based, which simply means that if the object is resized, then the stitch properties, including stitch spacing, stitch length, and underlay,...
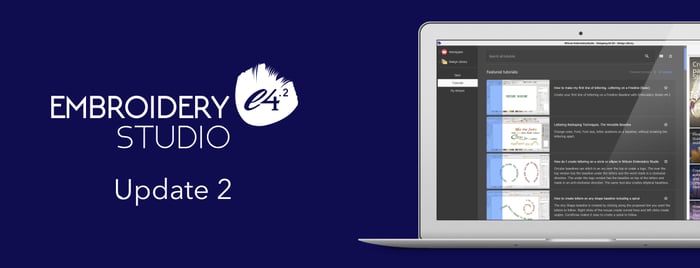
EmbroideryStudio e4.2 Update 2 is Released!
Blog | EmbroideryStudio | Release announcement
Design Workflow e4.2 is now available in the e4.2 Update 2. Update 2 for ES e4.2 will automatically download once you launch ES e4.2 if you have automatic download enabled. If not, visit the...

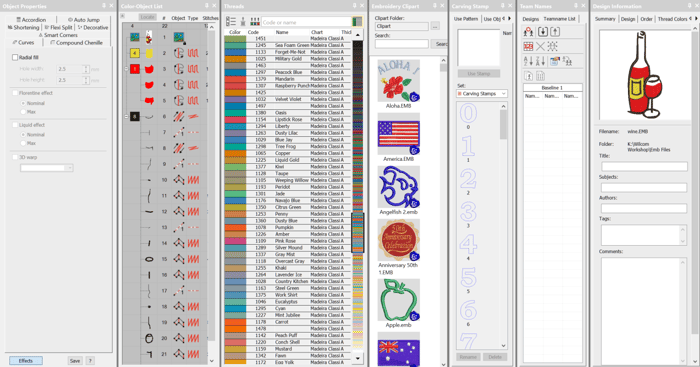
Save Standard Stitch Styles for Tools
Blog | EmbroideryStudio
In e4.2 it is possible to save a style of stitching to an input method.Make your changes in the work area and check the Save button from the bottom of the Color Object list (image top right) Select the...
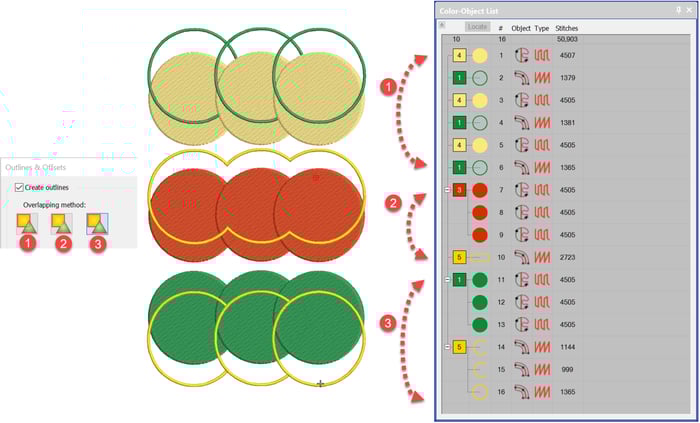
Outlines and Offsets
Blog | EmbroideryStudio
All of the digitising levels from Decorating up include the basic Outline Tool which is identified as around target icon in the Toolbox. The Advanced Outline and Offsets is a paid Element identified as...

Color Blending
Blog | EmbroideryStudio
In an earlier article we looked at Curved Fills, Florentine and Liquid Fills, the ideal companion Element to those is Color Blending.Color Blending can only be applied to to Satin...